|
|
|
Categories
|
|
Information
|
|
Featured Product
|
|
|
 |
|
|
There are currently no product reviews.
 ;
This schema available for me in good condition. I would highly recommend.
;
Thanks for this "hard to find" service manual.
I apreciate the good quality of scanning and the pages scanned in A3 format.
;
Helpd me mont a new carradio when prewius mont was a mess.
;
Very good service and quick service, very good quality of service manual!
;
Great tape deck manual!
I'm very positively surprised, because it is a very long manual, lot of pages, drawings, diagrams, description of how to make the alignment and adjustment procedures.
It is as good as the old "Naka" manuals from the 1970's - if somebody have seen them, they know what I mean by that.
I recommend to buy this very much !
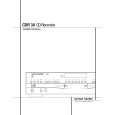
CDR30
harman/kardon
Installation and Connections
Batteries Insert the two AA batteries supplied with the CDR 30�s remote by turning the remote over so that the bottom of the remote is facing towards you. Gently lift the plastic tab on the battery cover up and away from you, and lift the lid off. Insert the batteries in the remote, being careful to follow the + and � polarity indications in the bottom of the compartment. Replace the cover by first seating the two small tabs into the mating holes at the top of the remote, and then gently push the cover down until the latch snaps into place with an audible click. IR Remote Connections If the CDR 30 is installed behind a cabinet or other obstruction that may block the path between the front panel Remote Sensor ¯ and the location where you will use the remote, an optional external IR sensor may be used. Connect the sensor to the Remote IR In Jack � on the rear panel. This jack may also be connected to the IR Output jack of another compatible Harman Kardon component or a compatible IR system remote product. You may also use the IR Sensor in the CDR 30 to send commands to other compatible remote products. Connect the Remote IR Out Jack � to the input of the other product or system. Power Connections Connect the AC Power Cord ¤ to an AC power source. The CDR 30 uses sensitive, highperformance computer-grade CD drives, and to protect them we recommend that you consider the use of a surge protector, just as you would for a computer. If the rear panel AC outlet on a receiver or other product is used, make certain that it provides at least 28 watts, and that the total power of all products connected does not exceed the maximum rated output of the product containing the outlets. If the CDR 30 is connected to a switched outlet, remember to turn on the outlet or product controlling it in order for the CDR 30 to operate.
NOTE: When replacing batteries, it always a good idea to replace both at the same time. When the remote will not be used for an extended period of time, it is also a good idea to remove the batteries to avoid the possibility of damage due to corrosion. Batteries contain chemical substances and we recommend that you dispose of them properly and in compliance with any local regulations.
14
|
|
|
> |
|